Wednesday, February 27, 2013

Tooth Certificate of Record

So, my son will soon be turning 6 and his first tooth should be coming out soon! I have been on pinterest and saw some very cute ideas but I didn't really want to pay for it .... I mean the memories are awesome but its just a piece of paper...Right? Anyway I am pretty good with my computer and decided to make my own. (Thanks to clip art ;) ) I took ideas of what I have seen and made it my own and put what I thought was the best little certificate from the tooth fairy. I hesitated on posting it but figured someone out there  might like it! 
Here you go I Put a little picture of an envelope but I am planning on getting a template for an envelope ! https://plus.google.com/photos/103629240386524066426/albums/5849862927717905649?authkey=CJLy4u3PxY2SPA
This is the link without the envelope ..... hope it works for you! 

Wednesday, February 6, 2013

DIY Handprint Calendar

Ok, I have been very busy making things and trying hard to make my kids childhood's as memorable as possible! So I know I am a bit behind but I am trying to catch up. After the holidays it seems like I am finally back to my routine of things. The craziness is over!!!  For Christmas my husband's family does gift exchanges amongst the adults, but I felt that the kids should get the grandparents a little something. I decided to go with a very personalized calendar. Being a fan of pinterest I found the template to a handprint calendar.
I thought this would be cute but instead of an 8.5 X 11 page calendar I found some desk calendars at the dollar tree. Then using the template from pinterest I made these calendars. I placed some color construction paper in the background and using my Cricut I cut 3X3 squares. And I alternated the months between both my kids. I bought a 6 color hand paint set made from Crayola at Toys R Us for around $5. I cut out the labels and hand wrote the poems ... it was the easiest option i could think of. 


And lastly for the cover I found a cute picture of my kids together... this one was from a year ago. And wrapped it up! 

Saturday, February 2, 2013

DIY Personalized Christmas Ornament

 Last year I got the idea to make a family ornament using pieces of clothing that represented each person in out family. For my son I used some Cars pjs, my daughter I used a piece of her swaddle blanket, for my husband I used an old work shirt and for myself I found an old shirt with roses on it (since my name is Rosa). But this year I decided to go a different route and use fabrics that I felt represented our family. For my son it was his first year in T-ball and found a nice print at Joanns. For my daughter she had a 50's themed 1 year old party and so she got a cherry print. For my husband I found a money print (kind of sad) but I couldn't find anything else. I was looking for tools but no luck. And for myself I got a print with cameras since I am the family photographer. Back to this years ornament, I made two templates 5" circle and 4.5'' circle. I pre cut all the fabric, leaving room for the sowing. I am not a great sower and do not know how to use a sowing machine. 

Here is what you will need...
- Fabrics of your choise 
- Scissors
- Thread and Needle
- Pins 
- Pen

 I Pre- Cut all my squares ...
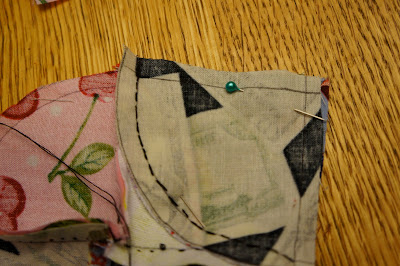
 And drew the lines where I was going to sow...
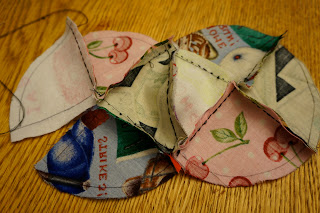
 Here is what it will look like when all four triangles are put together.
 This is how it looks like as I am adding the back to it! 

 Once I was done and left an opening to stuff the ornament, Using my Cricut I cut out 2012 and made a stencil. Afterwards using a piece of contact paper I used my stencil and wrote in 2012,  Using pins i placed it on the ornament and using a nice thread to write out the number. 
 Once that is done you can stuff the ornament with cotton and I used glue to seal the last piece together. 


Lastly I added a little ribbon to put the hook in and all done! 
And here are my ornaments. I hope to continue this tradition. I think one day my kids will enjoy them and we can always talk about why I chose them and any stories behind them.
Thanks for visiting!